
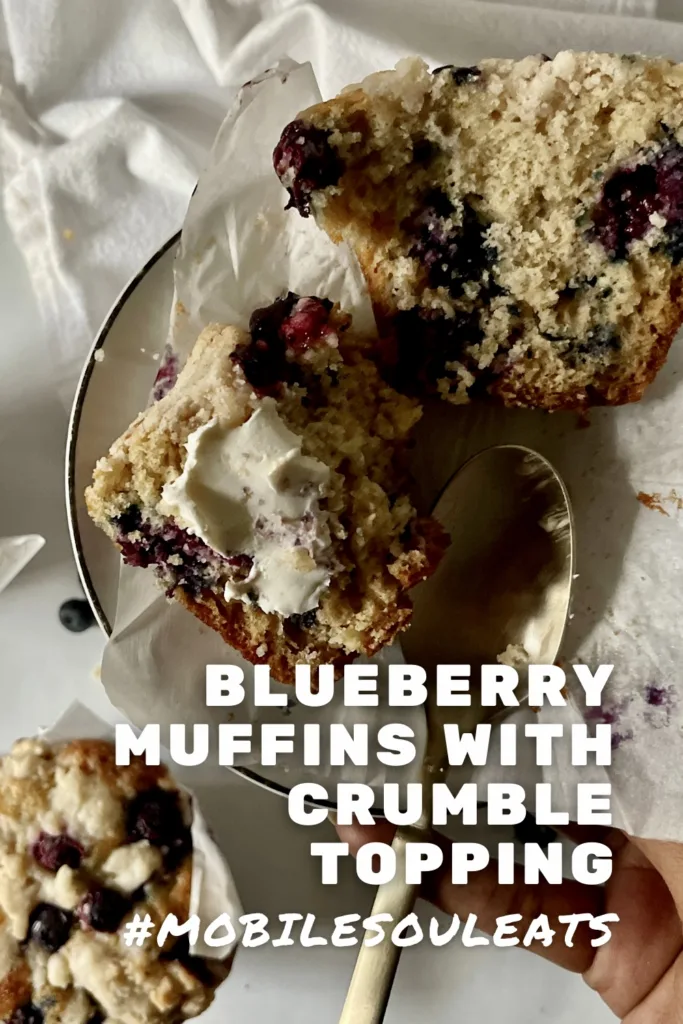
I have a serious sweet tooth, so once I realized blueberry muffins were basically cupcakes without frosting, they became one of my favorite things to have for breakfast. They are reliably delicious and, as I’ve come to find out, pretty simple to make at home. These blueberry muffins are filled with fresh blueberries and topped with a cinnamon-y crumble – a perfect combination of tart and sweet, soft and crunchy.
Your grocery list
Baking/Pantry Items
- White sugar
- Brown sugar
- Vegetable or canola oil
- Vanilla extract
- All-purpose flour
- Baking soda
- Kosher salt
- Ground cinnamon
Dairy
- Large eggs
- Buttermilk or plain, full-fat Greek yogurt
- Unsalted butter
Produce
- Fresh or frozen blueberries
- A lemon (optional, but recommended)
Equipment/tools you’ll need
- Muffin or cupcake tin (with 12 regular-sized wells – you will only use 6)
- Sift (for evenly incorporating the dry ingredients, but it’s optional. You can also use a whisk or fork to thoroughly de-clump the dry ingredients in a bowl before adding the wet ingredients)
- Measuring spoons and/or cups
- Mixing bowls
- Large paper liners and/or nonstick baking spray (or parchment paper which can be used to make your own)
- Rubber spatula
- Microplane (for zesting lemon, optional)
- Ice cream scoop
- Toothpicks for testing doneness
How to make blueberry muffins
Making the batter
Add oil, both sugars, eggs, buttermilk or yogurt, lemon zest, lemon juice, and vanilla extract to a mixing bowl. The order doesn’t really matter, but make sure they’re all well mixed.
Same for the dry ingredients: Add flour, baking soda, ground cinnamon, and kosher salt to a different bowl. Whisk to combine. Create a well in the dry ingredients, and pour the wet mixture into the dry. Gently fold to combine with a rubber spatula. About halfway through mixing, while some flour is still showing, add your blueberries.
Making parchment paper liners
- Find a cup that has a bottom that fits into the holes on the pan you are using.
- Cut six (6) identical, large squares of parchment paper – I’ve found that 7” inch squares work well for me and the depth of my pan
- Center a square of parchment paper over the cup and fold the sides down over the cup to form the paper into a muffin liner. Run your finger around the bottom of the cup to help the liner keep its shape.
- To further reinforce the liner’s shape, turn the cup and paper liner over into the pan, leaving an empty well between each liner to give your muffins space to rise.
- When filling the liners with batter, try to avoid getting batter in the various folds or outside the liner.
Baking and cooling
Once your batter is made, liners filled with batter, and oven preheated (350 degrees Fahrenheit), it’s time to bake!
Bake for 20-25 minutes or until the tops are golden brown and a toothpick comes out of the center mostly clean.
Carefully remove the muffins from the oven and line onto a cooling rack for at least 10 minutes.
Storage
Store your muffins in an airtight container, at room temperature, for 2-3 days. You can also store them in the same container in the fridge for up to a week. To freeze: cool and wrap individually in plastic wrap or parchment paper then seal in a freezer bag (with as little excess air as possible) for up to 2 months.
Ways to switch up your muffins
Experiment with add-ins
- Chocolate chips
- Chopped nuts: pecans, peanuts, or slivered almonds
- Dried fruits: oranges, apricots, apples, raisins (dried grapes)
- Flavor extracts: almond, lavender, rose
- Preserves or jams (carefully pour and swirl these into the batter after it’s been poured into the muffin tin or loaf pan)
Make mini muffins
Use a mini muffin pan to create adorable, snackable, shareable muffins.
Add a drizzle or glaze
Most muffins don’t have frosting (because then it’d be a cupcake) but a citrus-flavored glaze could be a way to add another layer of flavor and a little extra moisture to your muffins.
Enjoy them with cream cheese
My favorite way to eat muffins is slightly warm with a smear of cream cheese. Try it. It’s perfection!
Leave a Reply