Summary
There are few things better than homemade sweet potato pie. But one of those few things is sweet potato hand pies. The convenience, portability, and the feeling that this whole delicious thing is just for you?! Priceless. And, for us crust-lovers, it doesn’t hurt that all of the filling is completely surrounded by a flaky, buttery crust that complements both sweet and savory ingredients perfectly! This recipe can be made using our easy all-purpose pie dough recipe or with pre-made pie dough.
Your Shopping List:
Produce
- Sweet potatoes
Dairy
- Unsalted butter
- Eggs
Baking & Pantry Items
- All-purpose flour
- Sea salt (can be used for filling, but mainly for topping)
- Ground cinnamon
- Ground nutmeg
- Brown sugar
- Evaporated milk
- Vanilla extract
Frozen Section
- Pie dough (shortcut!)
Bonus! (Optional)
- Your favorite bourbon
- White sugar (to make cinnamon-sugar topping)
- Fresh ground ginger or ground ginger
- Black and white sesame seeds (for alternative topping)
Equipment you’ll need:
- Measuring cups/spoons
- Mixing bowls
- Rolling pin
- Silicone mat or parchment paper
- Pizza cutter or round biscuit/cookie cutters (for easy dough cutting)
- Baking sheet
The history of hand pies
Whether they’re called hand pies, empanadas, patties, small portable pies with both sweet and savory fillings exist in cuisines all around the world. What they’re called just depends on where you are.
In the Caribbean, a patty often refers to a dough that is filled with spiced ground meat and enjoyed with coco bread.
Empanadas are popular in countries of Spanish origin and involve pastry being filled with savory fillings.
Meat pies and hand pies have roots in European cuisines.
My most fond memory of hand pies are the fried apple hand pies my Uncle Connie, one of my dad’s brothers, would make for family gatherings – Fourth of July, specifically. They are good piping hot, luke warm, and even straight out of the refrigerator.
The point is, it is safe to assume every person in the world has run into some form of hand pie in their life. Like rice, hand pies are a culinary reminder that we are more similar than we often seem.
A note about stringy sweet potatoes
Sweet potatoes may vary in the level of stringiness, but almost all varieties that are available to us will likely have some strings. BUT, there are ways to minimize the stringiness and make a filling that is consistently smooth and creamy.
How to minimize stringiness in your filling
If (oven) roasting the sweet potatoes:
- Cut off both ends of the roasted sweet potato
- Let the sweet potatoes cool
- Split the skins in half (the long way) and open the potato
- Carefully remove any obvious strings from the potato, leaving behind the pulp
- Use a blender or food processor to combine filling ingredients
If boiling the sweet potatoes:
- Peel and cut the sweet potatoes into 1-inch rounds
- Finish dicing into (approximately) 1-inch pieces
- Boil in a large pot until a knife can easily pierce the potato
- Drain and let the sweet potatoes cool
- Use a blender or food processor to combine filling ingredients
Making sweet potato hand pies: an overview
Making hand pies is pretty similar to making regular pie. Just prepare your filling and your pie dough, assemble, and bake.
Boil or Roast the potatoes
To cook the sweet potatoes before making the filling, you can roast or boil them. Roasting concentrates the sweet potato flavors and makes for a tastier filling, but boiling is somewhat of a quicker process – taking only 20 minutes or so to boil, depending on the size
Before boiling the potatoes, you will have to peel and dice them into small chunks.
So it’s up to you. If you don’t feel like peeling them, but have an hour or so to spare for roasting, I recommend that.
Mash potatoes and let them cool
After the potatoes have cooked, remove any excess strings you see or feel then begin mashing them. Be very careful if mashing while the sweet potatoes are still hot.
Leave the mashed potatoes for about 30 minutes to cool before adding the rest of the ingredients for the filling. You don’t want your eggs cooking before it’s time to bake the hand pies.
Make pie filling
Combine mashed sweet potatoes, sugars, eggs, vanilla extract, ground cinnamon, and ground nutmeg in a bowl. Whisk vigorously to eliminate any clumps and to further break down any remaining strings.
You can even use a food processor or blender to give your filling a truly consistent texture.
Roll out and cut dough
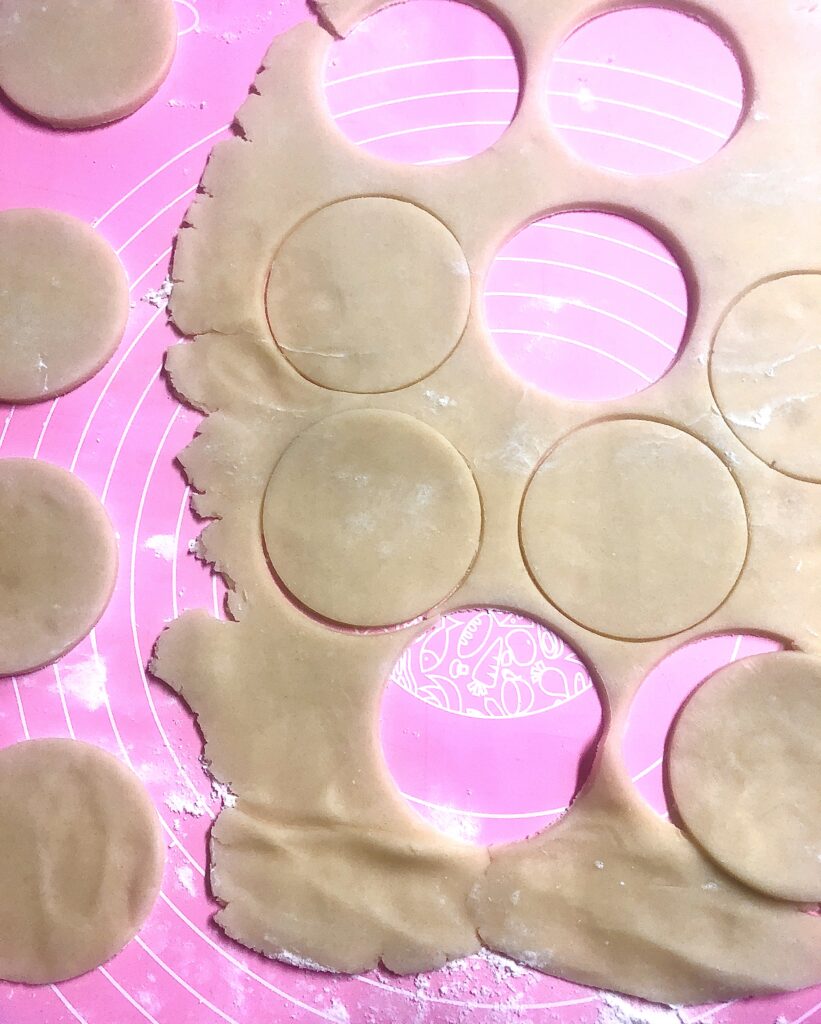
The dough should be rolled to about 1/8-inch thickness and it can be cut into either 4×4-inch squares or 4-inch round pieces of pie dough.
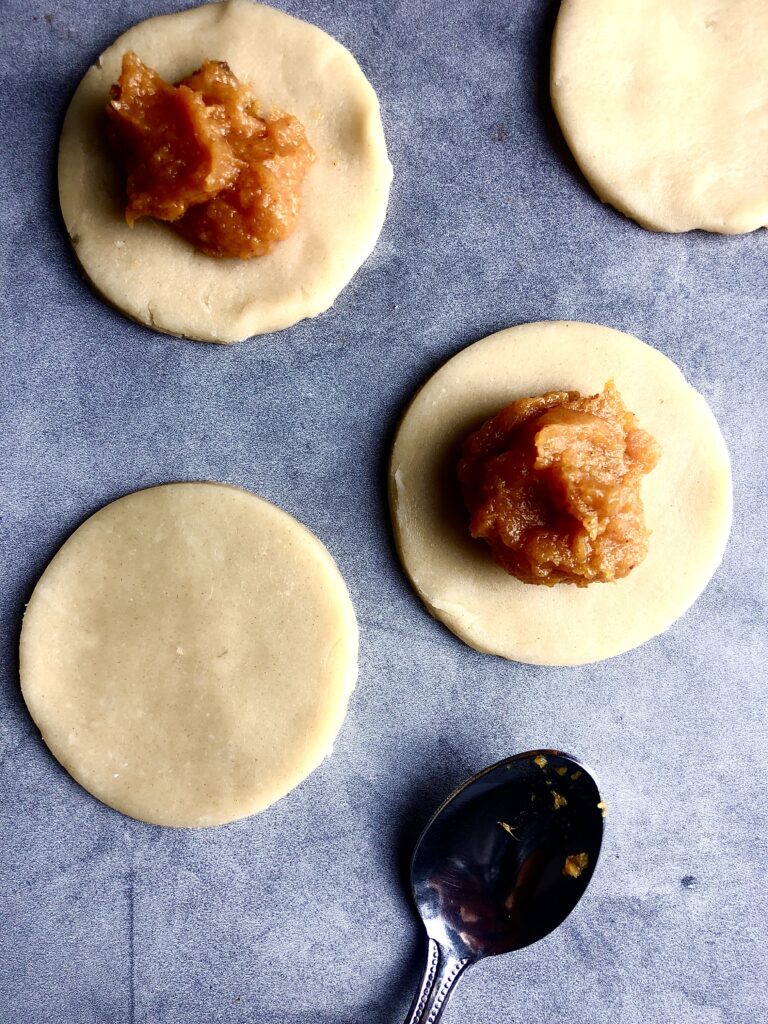
Assemble pies
To make larger hand pies, use one piece of pie dough as the base, brush along the edges with egg wash, add another piece of dough to use the top cover.
For smaller hand pies, a single piece of pie dough can be filled, folded over, brushed with egg wash, then sealed.
Use a fork to press along the edges and completely seal the filling into the pie dough.
Use a butter knife to cut small slits into the top of each pie. This helps steam escape from the inside while they cook instead of accumulating and potentially breaking the top crust.
For extra crunch and a golden brown outside crust, brush the tops of each hand pie with more egg wash.
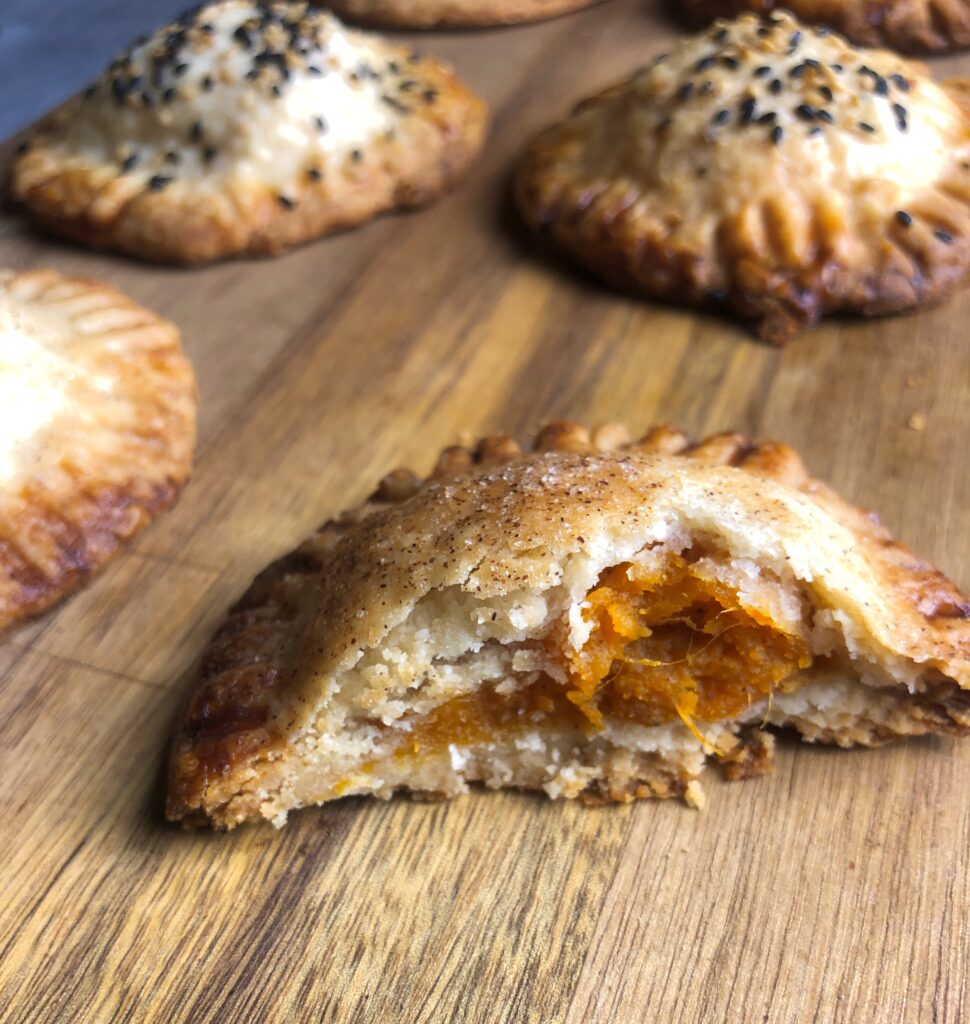
A light sprinkle of sea salt will add even more crunch and will help balance the sweetness in the filling.
Bake and enjoy!
Preheat the oven to 400º F (205º C) or 375º F (190º C) in a convection oven. Line assembled hand pies on a parchment-lined baking sheet at least 1 inch apart.
Bake for 11-15 minutes or until the crust is golden brown. The larger the hand pies, the longer they will take to finish.
I know it’s hard, but try to wait at least 15 minutes before digging in. The filling’s consistency is much more pleasant once it is no longer piping hot.
How to store sweet potato hand pies
Storage
Store in an airtight bag or container in the refrigerator for up to 7 days.
How to freeze
After assembling but before baking: the pies can be placed on a parchment-lined baking sheet and frozen. Once frozen, they can be wrapped in plastic wrap and stored in freezer-safe bags or containers for up to 3 months. To bake them: remove them from the freezer and bake immediately in a 400º F oven for 20 minutes.
Freezing baked hand pies: wrap thoroughly in plastic wrap then stored in freezer-safe bags or containers for up to 3 months. To warm: Place in a 300º F oven and warm for 10 minutes. Keep in mind that the texture will change over time.
Tips and tricks to remember
- Roasting is better than boiling. Roasting caramelizes the natural sugars and concentrates the sweet potato flavor, which makes for a more flavorful filling. It also eliminates the extra water that’s involved in boiling the sweet potatoes.
- Use evaporated milk. You can use lots of kinds of milk for your filling – whole milk, half-and-half, almond or oat milk – but evaporated milk brings a unique sweetness and creaminess.
- Avoid using pumpkin spice. Whether it’s pre-made or homemade, pumpkin spice is for pumpkin pie. Sweet potato pie doesn’t require a bunch of spices, just let the natural sweet potato flavor shine.
- Keep your dough cool. While mixing the filling and working with one sheet of pie dough, keep the other dough in the fridge to keep it cool. The tender flakiness of your finished hand pies depends on it.
- Use enough filling, but not too much. Leave at least 1/4-inch of empty space around the edge of each pies of dough. You want enough space to brush with egg wash and crimp the edges.
Substitutions and modifications for your sweet potato hand pies
- No evaporated milk? That’s okay! Use whole milk, heavy cream, half-and-half, almond milk, or oat milk. If you’re in a pinch, you could even use a bit of water to help the filling come together.
- Instead of light brown sugar, use the same amount of dark brown sugar, white sugar, natural (raw) sugars, splenda, honey, agave syrup, or maple syrup can be used.
- If you want an even more homemade and tastier experience? Use homemade pie crust. Here’s our favorite all-purose pie dough recipe.
- Add a splash (1-2 tablespoons) of your favorite bourbon for another layer of flavor.
- Want even more of a kick? Add a little bit of ground ginger or minced fresh ginger to the filling.
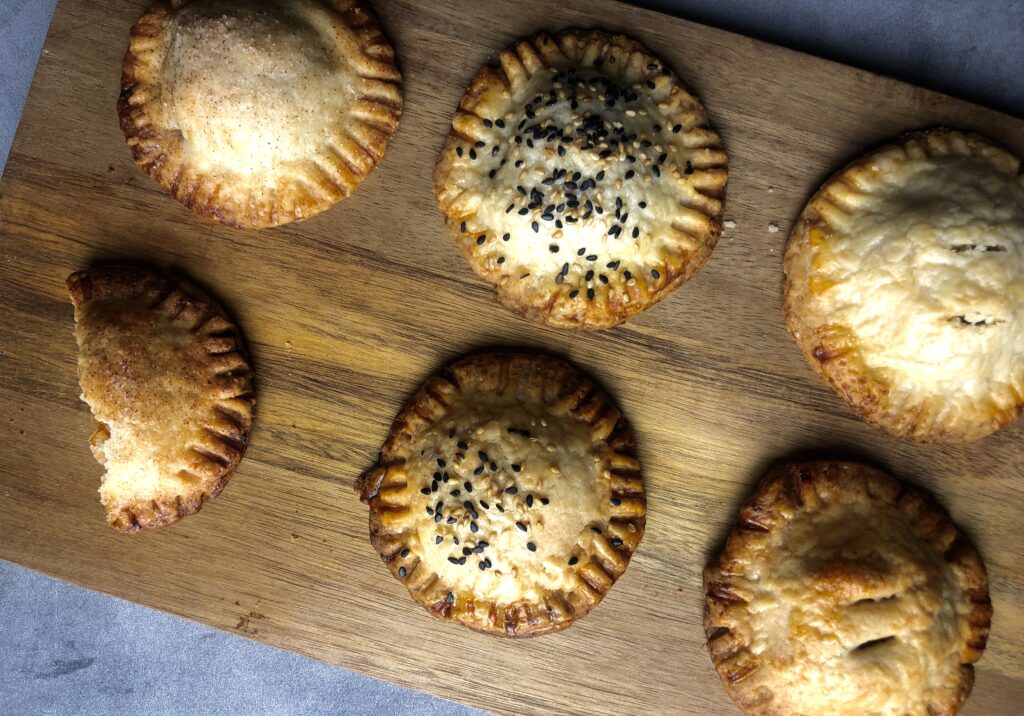
(from left to right: Cinnamon Sugar – Sesame Seed – Plain)
Leave a Reply